Freediving Breath Exercises: Train Smarter, Not Harder
freediving
Mares-Alberto-Balbi
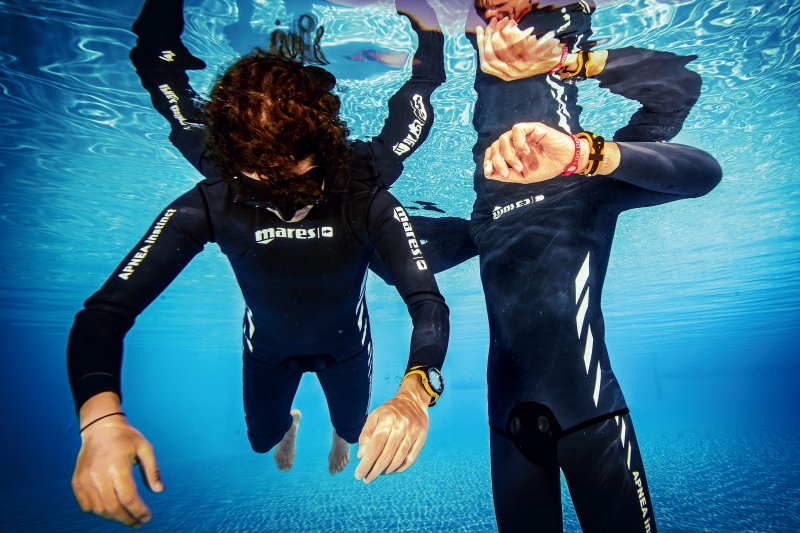
Freediving is often associated with long breath holds and impressive depth records. Yet performance begins in a quieter place, before the descent, as the jaw loosens, the shoulders drop, and each exhale slows the body down. The most effective freediving breathing exercises build relaxation, efficiency, and mental control instead of simply chasing greater lung capacity. Practiced correctly, they reduce oxygen use, calm the heart rate, and make each breath hold feel steadier. Structured freediving breath exercises give that practice a safer, more deliberate rhythm.
Table of Contents:
-
Why Freediving Breath Exercises Favor Efficiency Over Lung Size
-
Relaxation Breathing and Visualization
-
Basic Stretching for Breath Holds
-
Pranayama-Inspired Breathing
-
Dry Static Apnea: A Step-by-Step Example
-
Apnea Walks: Controlled Movement Training
-
CO2 Tables for Freediving
-
O2 Tables
-
Train Smarter with Structured Sessions
-
When to Progress to Formal SSI Training
-
Dive Deeper
Many new freedivers assume success depends on larger lungs. With experience, they discover that progress often begins when the body grows quiet instead of fighting every second of the breath-hold. Proper freediving breath exercises reduce tension and wasted movement, helping you remain calm as CO₂ rises and the urge to breathe gradually moves into the foreground.
When the body relaxes, the muscles demand less oxygen and the breath-hold begins to feel less like a contest. Controlled breathing before a dive can slow the heart rate and quiet the stream of thoughts that otherwise follows you into the water.
Training also sharpens awareness. You begin to notice a rushed inhale or the first flicker of tension before it spreads through the body. With practice, the breath hold feels quieter and more controlled without forcing maximum effort.
New to freediving? SSI's guide to breath-hold diving explains the core skills, safety principles, and first steps into the sport.
Relaxation is the foundation of freediving. Before a breath hold, let the pulse, breathing, and muscles settle until the body feels quiet rather than braced.
Inhale slowly through the nose for 4 seconds, then let the breath leave gently over 6 to 8 seconds. As the longer exhale empties the chest, the hurried rhythm begins to fade and the heart rate has time to settle.
Visualization can deepen that calm. Picture the water carrying your weight or the dive line gliding past during an unhurried descent. Paired with slow breathing, that simple image gives the mind one steady rhythm to follow instead of chasing every passing thought.
Practice these gentle freediving breath exercises on land with normal breathing. Once you add breath holds, train after formal instruction with a qualified buddy. The body then learns a familiar path from tense and busy to quiet and ready.
Tight muscles around the diaphragm and rib cage can make a full inhale feel boxed in. Gentle stretching gives the ribs room to open and makes breathing feel easier at depth.
Stand tall, raise both arms overhead, and lean slowly to one side. Hold for 15 to 20 seconds, then switch sides. The stretch should open the space between the ribs gently, without forcing it.
For the diaphragm area, sit upright, inhale slowly, then exhale fully as the shoulders round forward. Let the air leave smoothly, hold briefly, and return to neutral.
With practice, a full breath opens through the ribs with less resistance, so the body feels prepared rather than braced. SSI's guide to flexibility and yoga for freediving offers additional mobility exercises that can help create more space around the rib cage and diaphragm.
Pranayama techniques from yoga complement freediving breath exercises by building breath control and awareness. Box breathing gives the inhale, hold, exhale, and pause equal timing, creating a steady square rhythm.
A beginner pattern uses 4 seconds for each phase. The count becomes a quiet metronome as you inhale, hold, exhale, and pause in the same measured rhythm. Practicing it at home can make that calm pattern feel familiar before a dive session or course begins.
Alternate nostril breathing also promotes relaxation and focus as attention follows the airflow from side to side. Both methods train the calm mental control that freediving asks for.
Dry statics are freediving breath exercises performed at rest outside the water. A bed or mat may support the body, but it does not remove the risk of blackout. Practice dry static apnea only after completing beginner training and with a qualified buddy, once recovery breathing and breath-hold safety are already familiar.
Example dry static session:
- Lie comfortably on a bed or yoga mat and let the surface carry your weight as your buddy watches.
- Spend 2 to 3 minutes doing relaxation breathing until the shoulders settle.
- Take a calm, full inhale without hyperventilating, then begin the breath hold without gulping or straining.
- Keep still and soften the shoulders, jaw, and face instead of holding tension.
- End the hold when a moderate urge to breathe arrives, before it becomes a struggle.
- Use the recovery breathing taught in your beginner course until you feel fully steady again.
Across 3 to 4 calm rounds, these freediving breath exercises make the sensations easier to recognize. You feel how the urge builds without turning every hold into a record attempt.
Apnea walks add movement to breath-hold training, so working muscles raise CO₂ and bring the urge to breathe sooner. These freediving breath exercises make that change easy to notice.
A simple example:
- Stand in a clear area with a qualified buddy and complete 2 minutes of calm relaxation breathing.
- Take a comfortable inhale and begin walking slowly with quiet, unhurried steps.
- Count the steps until a moderate urge appears, treating the number as information, not a score.
- Stop immediately and use controlled recovery breathing until you feel steady.
- Rest for 2 minutes before repeating and let the heart rate settle.
Start conservatively and focus on relaxation, not distance. Add steps only when the body stays calm. Never push past the urge to breathe because a standing blackout can cause a hard fall. Practice with a qualified buddy after completing a freediving program.
Unsure freediving is for you? Starting Freediving: Busting the Myths That Hold Beginners Back shows why calm technique matters more than talent.
mares
CO₂ tables can help advanced freedivers build tolerance to rising carbon dioxide levels.
Example CO₂ table:
Round 1: Breath hold 1 minute, rest 2 minutes
Round 2: Breath hold 1 minute, rest 1 minute 45 seconds
Round 3: Breath hold 1 minute, rest 1 minute 30 seconds
Round 4: Breath hold 1 minute, rest 1 minute 15 seconds
Continue reducing rest time each round.
This format keeps the breath-hold time constant while shortening each recovery period. As the rounds progress, the urge to breathe may arrive earlier and feel stronger, so advanced freedivers can practice staying relaxed as CO₂ rises.
O2 tables work differently. These freediving breath exercises increase the breath-hold time while keeping the recovery period consistent, allowing oxygen levels to fall further as each hold becomes longer.
Example O₂ table:
Round 1: Breath hold 1 minute, rest 2 minutes
Round 2: Breath hold 1 minute 15 seconds, rest 2 minutes
Round 3: Breath hold 1 minute 30 seconds, rest 2 minutes
Round 4: Breath hold 1 minute 45 seconds, rest 2 minutes
Continue gradually increasing hold time
CO₂ and O₂ tables are generally introduced during advanced freediving training. Practice them only after certification and under proper supervision from a trained buddy or Freediving Professional.
SSI's Training Techniques program helps you build a personal plan around your strengths and weaknesses.
A balanced session combines relaxation, stretching, and controlled holds. Give the ribs time to loosen and the breathing time to slow before a short dry static begins, rather than carrying tension straight into the hold.
Keep sessions short and calm to avoid overtraining. Good practice should leave you steadier, not tense or exhausted. Consistent, moderate sessions work better than intense, irregular attempts.
Listen to your body. If the jaw clamps, the shoulders tighten, or you feel fatigue or dizziness, stop immediately. Safe freediving breath exercises place control before performance.
Before attempting CO₂ tables, O₂ tables, apnea walks, or dry statics, get formal instruction. SSI courses teach relaxation breathing, recovery breathing, buddy observation, and safety procedures in a structured setting.
The SSI Freediver program teaches proper technique, buddy protocols, and structured training. You learn to recognize when a hold stays calm and controlled and when it is time to stop.
Use the SSI Center Locator to find professional instruction nearby and build advanced training on skills you have already practiced.
predrag vucovick
Effective freediving breath exercises focus on relaxation, efficiency, and control. Progress often arrives quietly. Your breathing settles sooner, tension releases before the hold begins, and recovery feels calmer afterward. Gentle breathing, stretching, visualization, and structured dry practice build that steadiness one session at a time.
Ready to feel the difference in your own training? Begin with the SSI Freediver course or ask an SSI Professional about Training Techniques.